Why Your Outlook Inbox View Changed: Quick Guide to Revert
It’s not uncommon for Outlook users to suddenly notice that their inbox view has changed. This can be disconcerting, particularly if you rely on a specific layout for managing your emails efficiently. The good news is that there is a reason behind these unexpected changes, and it is entirely possible to restore your preferred inbox view with just a few clicks.
Sometimes, Outlook or other software updates can lead to alterations in the inbox display. Other times, a simple misclick or unintentional keyboard shortcut can result in your entire inbox appearing differently. Regardless of the cause, understanding why your inbox view changed and how to change it back will help you quickly regain control over your email organization.
Key Takeaways
- Unanticipated updates or accidental actions can change the inbox view in Outlook
- Knowing the cause behind the change helps users regain control of email organization
- Resetting the inbox view can be achieved with a few simple steps
Why Your Outlook Inbox View Changed
Automatic Updates
Sometimes, your Outlook inbox view changes due to automatic updates from Microsoft. These updates aim to enhance the user experience by introducing new features or fixing bugs. However, they might unintentionally alter the way your inbox looks. When this happens, don’t worry, as you can easily restore the previous layout.
Customization
Another reason your Outlook inbox view might have changed is through personal customization. You might have inadvertently clicked on a setting or feature that adjusted your inbox view. In this case, you can simply follow the steps to reconfigure your settings and revert the inbox view back to your preferred layout.
Knowing how and why your Outlook inbox view changed can help you quickly get back to a familiar environment and boost your productivity.
How to Identify the Changes
When you open your Outlook and realize that your Inbox view has changed, it might be a little disorienting. However, there’s no need to worry. Identifying the changes is a simple process that can help you understand the situation better. Let’s walk through the steps to recognize what has changed in your Inbox view.
In the first instance, pay attention to how your emails are displayed. Are they listed in a different order than before? Maybe they’re sorted by date, sender, or subject, whereas you previously had a different arrangement. Remember that the changes could also be subtle – for instance, the reading pane might be on the side instead of at the bottom, or the size of the text might be altered.
Take a look at any changes in email grouping or categorization. Sometimes, the system might be set to group conversations together, called “threaded view,” which will cause them to appear as single entries. This could result in a significantly different view if it previously showed individual emails. Additionally, your emails might be organized into different folders or marked with flags, categories, or color codes that you didn’t set up before.
Finally, examine the interface elements and buttons that you may frequently use. These changes include redesigned icons, relocated buttons or panels, or different customization options. For instance, the right-click context menu might display different choices or the toolbar could be hidden. All of these alterations contribute to a change in your Inbox view.
By assessing these elements, you can identify the changes in your Outlook Inbox and then take necessary steps to change it back to your preferred layout.
Steps to Change Outlook Inbox View Back
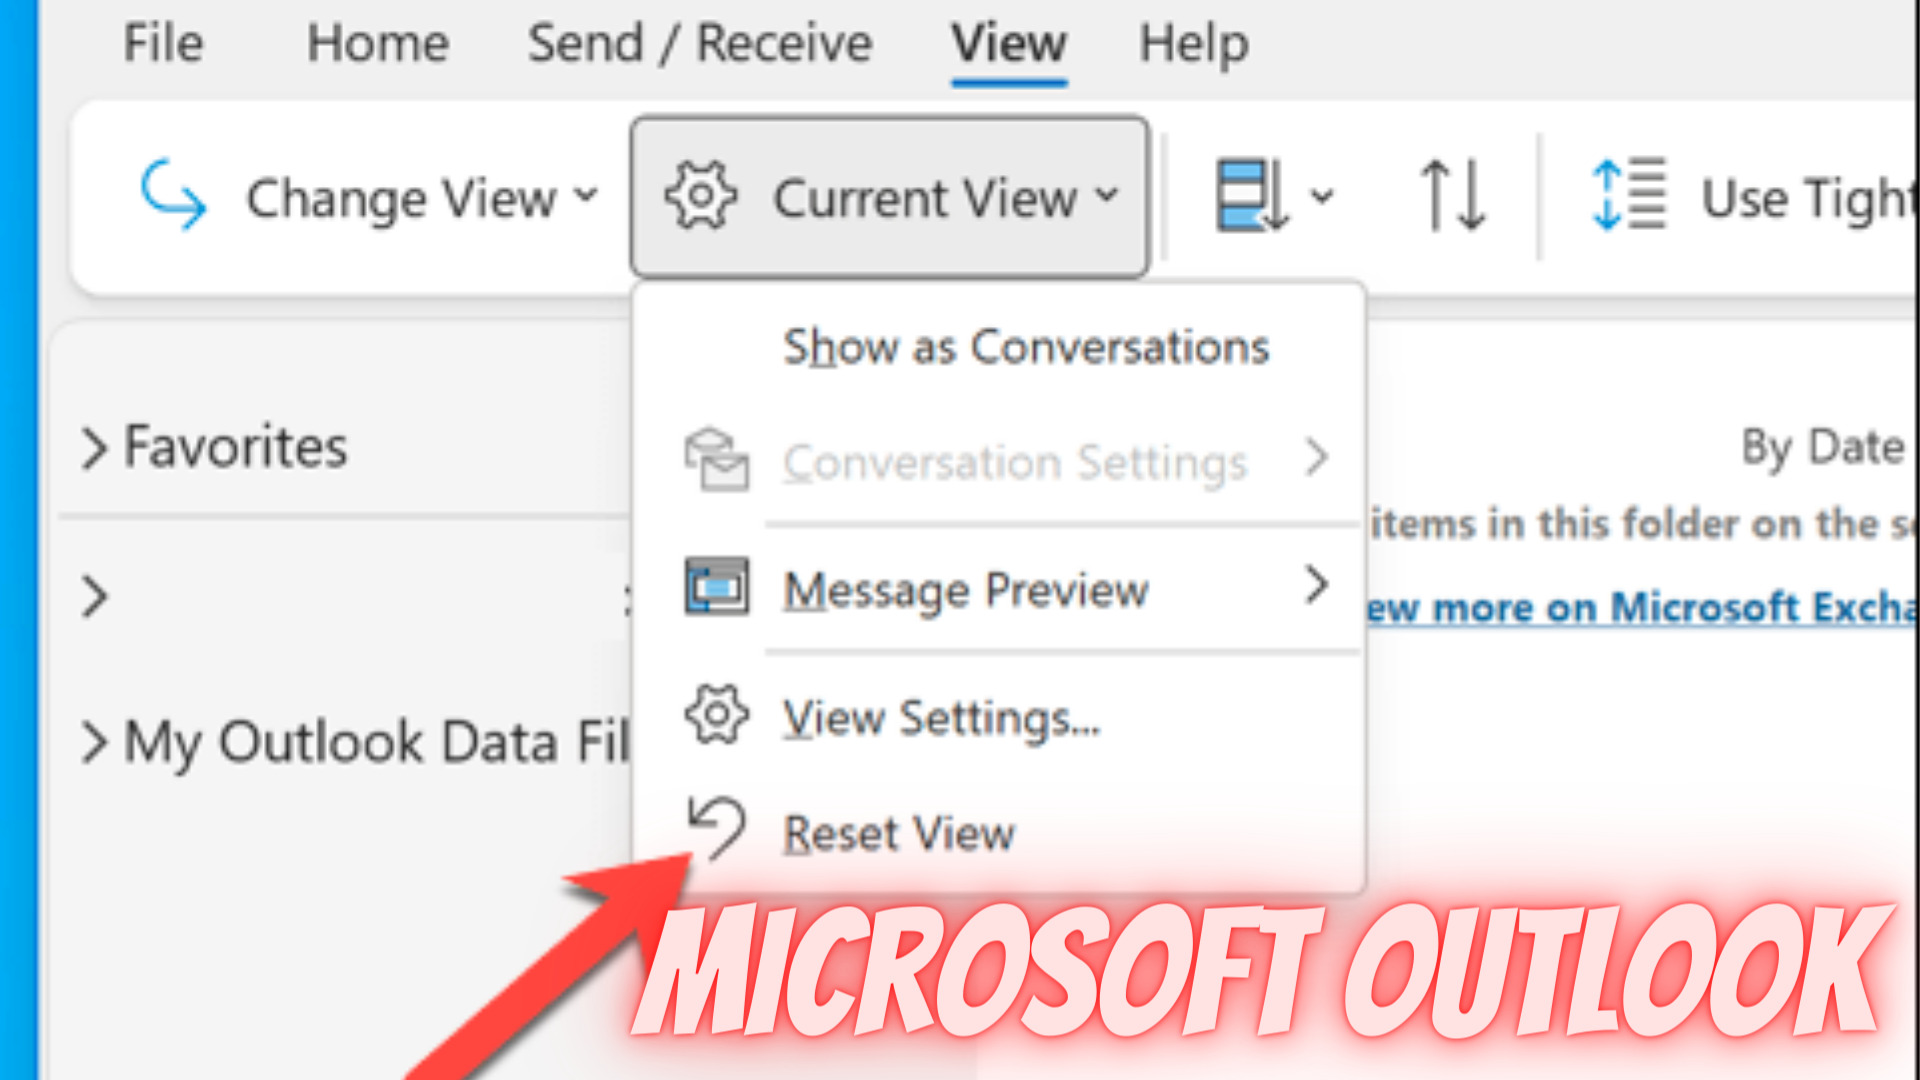
Reset View Settings
To restore your Outlook Inbox view to its default configuration, follow these steps:
- Launch Outlook on your PC.
- Select the View tab at the top of the screen.
- Press the Reset View button to revert back to the default Outlook layout.
By doing this, your Outlook Inbox view should return to its original appearance.
Adjust View Options
For further customization, you can adjust various view settings to suit your personal preferences:
- Go to the View tab again.
- Click on the View Settings button.
- In the Advanced View Settings window, make adjustments as desired:
- Columns: Control which columns are visible and their order in your Inbox.
- Group By: Organize your emails into groups based on specific criteria.
- Sort: Determine the order in which your emails are displayed.
- Filter: Define criteria to display only specific emails.
- Conditional Formatting: Apply custom formatting rules to messages based on certain conditions.
- Click OK to apply your changes.
Save Custom Views
After making adjustments to your Outlook Inbox view, you can save these settings as a custom view for easy access in the future:
- Navigate to the View tab.
- Click on Change View.
- Select Save Current View As a New View.
- Give your custom view a unique name and click OK.
Now, whenever you want to switch to your custom view, simply go to the View tab, click on Change View, and select your saved view from the list.
Preventing Unwanted Changes
Keeping your Outlook Inbox view consistent can save you time and frustration. To avoid unwanted changes, follow these best practices.
First, be cautious when exploring new settings or customizations in Outlook. It’s easy to accidentally make changes you didn’t intend to, so only make adjustments when you are confident you understand the impact on your Inbox view. Remember that you can always use the Reset View option to revert to the default layout.
Next, create a backup of your preferred settings. Outlook allows you to export your current settings, including your Inbox view and other customizations. You can then import them again in case of any accidental changes:
- Go to File > Options > Advanced.
- Scroll down to the Export section.
- Click on Export.
- Choose Export to a file, and click Next.
- Select Outlook Data File (.pst), and click Next.
- Choose your Inbox or other folders with custom views, and click Next.
- Save the file to a safe location.
Finally, consider setting permissions on your Outlook folders. By restricting access, you can ensure that no one else changes your views or settings without your knowledge. To set folder permissions:
- Right-click on the folder you want to protect (such as your Inbox).
- Choose Properties.
- Select the Permissions tab.
- Click on Add to include users, and set their permission levels.
Following these steps, you can maintain control over your Outlook Inbox view and prevent unwanted changes.
Frequently Asked Questions
Why did my Outlook inbox view suddenly change?
Your Outlook inbox view may have changed due to a software update, accidental setting adjustments, or organizational administrator customization. It’s not uncommon for updates to change default settings, so keeping track of applied updates and changes within your organization is important.
How can I restore the default Outlook view?
To restore the default Outlook view, follow these steps:
- Open Outlook and select the “View” tab from the ribbon.
- Click on “Reset View” in the “Current View” group.
- Confirm by clicking “Yes” when prompted.
This will restore the default view settings for the selected folder.
What causes Outlook view changes on the left side?
Alterations to the Outlook view on the left side, also known as the “Folder Pane,” can be caused by updates, adjustments in settings, or add-ins. If you notice any changes, try resetting the view or disabling any recently installed add-ins to resolve the issue.
How do I prevent Outlook from altering views?
To prevent Outlook from altering views automatically, ensure that automatic updates are not automatically changing any settings. Additionally, create a backup of your preferred view settings by exporting them, so you can easily restore them in case of unwanted changes.
Why does Outlook inbox view change after viewing calendar?
Outlook inbox view might change after viewing the calendar due to a setting called “Folder Pane.” To fix this, go to the “View” tab, select “Folder Pane,” and choose “Normal” to display both the inbox and calendar as intended.
Is there a way to reset the Outlook view to default in 2022 or 2023?
Resetting the Outlook view to default works similarly across versions. In Outlook 2022 and 2023, follow the same steps mentioned earlier:
- Open Outlook and click on the “View” tab.
- Choose “Reset View” from the “Current View” group.
- Confirm by clicking “Yes” when prompted.
This will reset the selected folder’s view settings in Outlook 2022 and 2023.


